

Part 1 – Creating the Plug
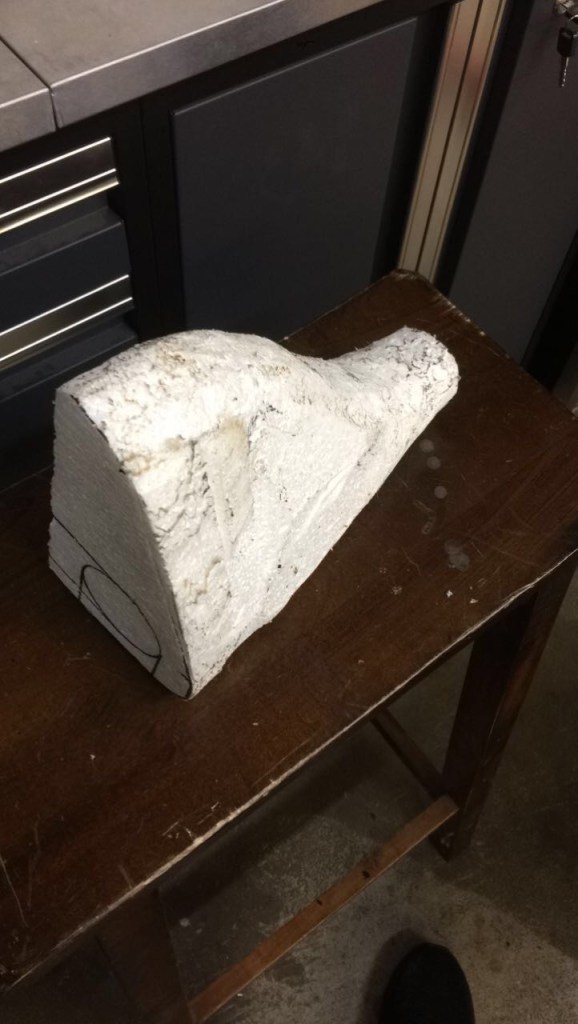
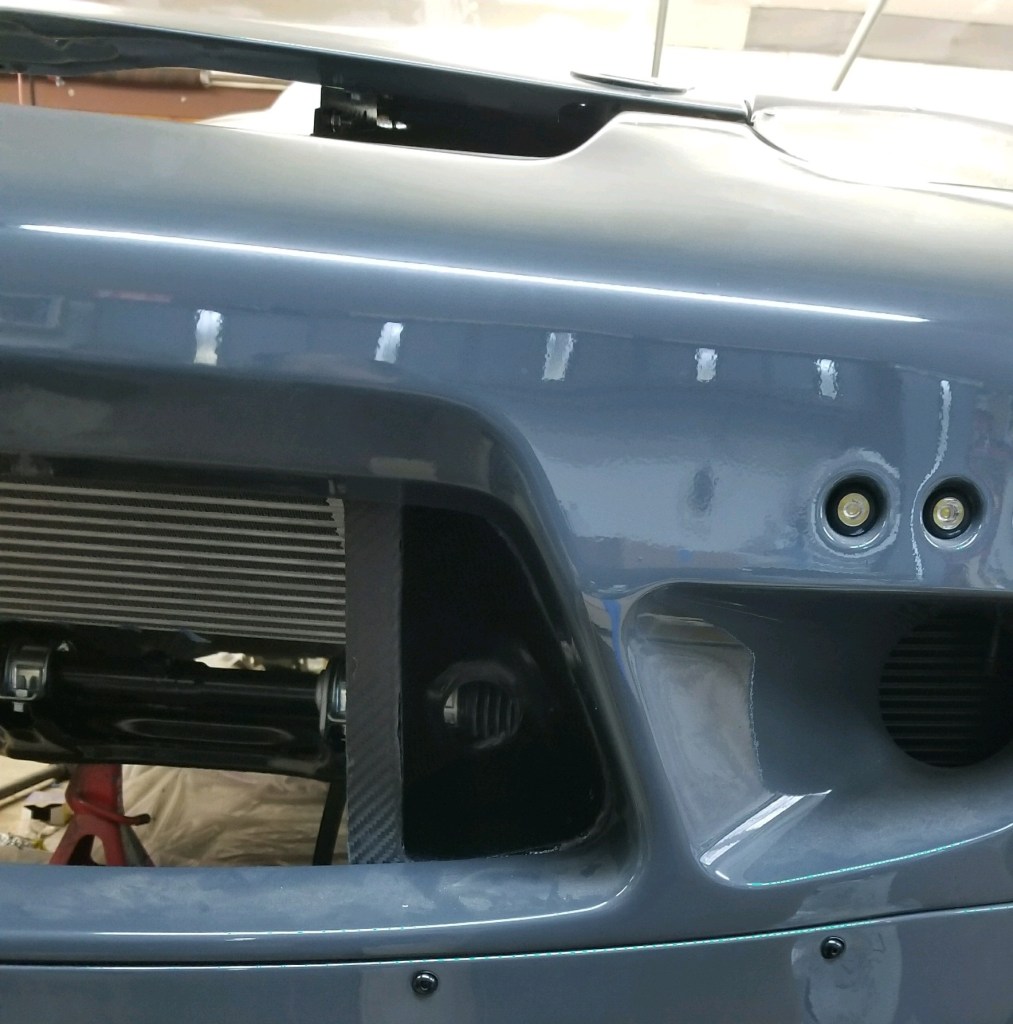
This particular project is a duct that will sit inside the bumper of an RX-7 and feed air to a big brake kit. It needs to sit right behind the bumper and have an opening that is similar in shape to the curve of the bumper. This opening also needs to taper down to an exit that is just slightly smaller than 2.5” diameter so a hi-temp flex hose can clamp to it. Because the shape wasn’t easy to measure, and ultimately required a bit of guess work, foam seemed like the best option to be able to start with a rough shape and work it down until it was right.
Using sharpie sketches on various sides of the piece, the foam was carefully carved while test fitting in the bumper along the way to check fitment (Note that heating up a knife with a heat gun helped shave away the foam without tearing out chunks uncontrollably). After about an hour of cutting foam and verifying the fit (the part was left a little small since the carbon would be layered on top of this plug which would ultimately create a larger part) the foam shape was completed and it was on to the next stage.
Using a bit of Bondo Body Filler (the same kind you’ll find at your local hardware store) the foam shape was covered completely fill in any uneven areas. This particular stage might require a few layers, like this plug did, so continue to let dry, sand, and add layers until you get the smooth shape you’re looking for. Be sure to keep in mind that subsequent layers will build thickness on the plug so your overall part will be larger with each added layer. Test fit your piece during this process as well to be sure you haven’t gone too large.
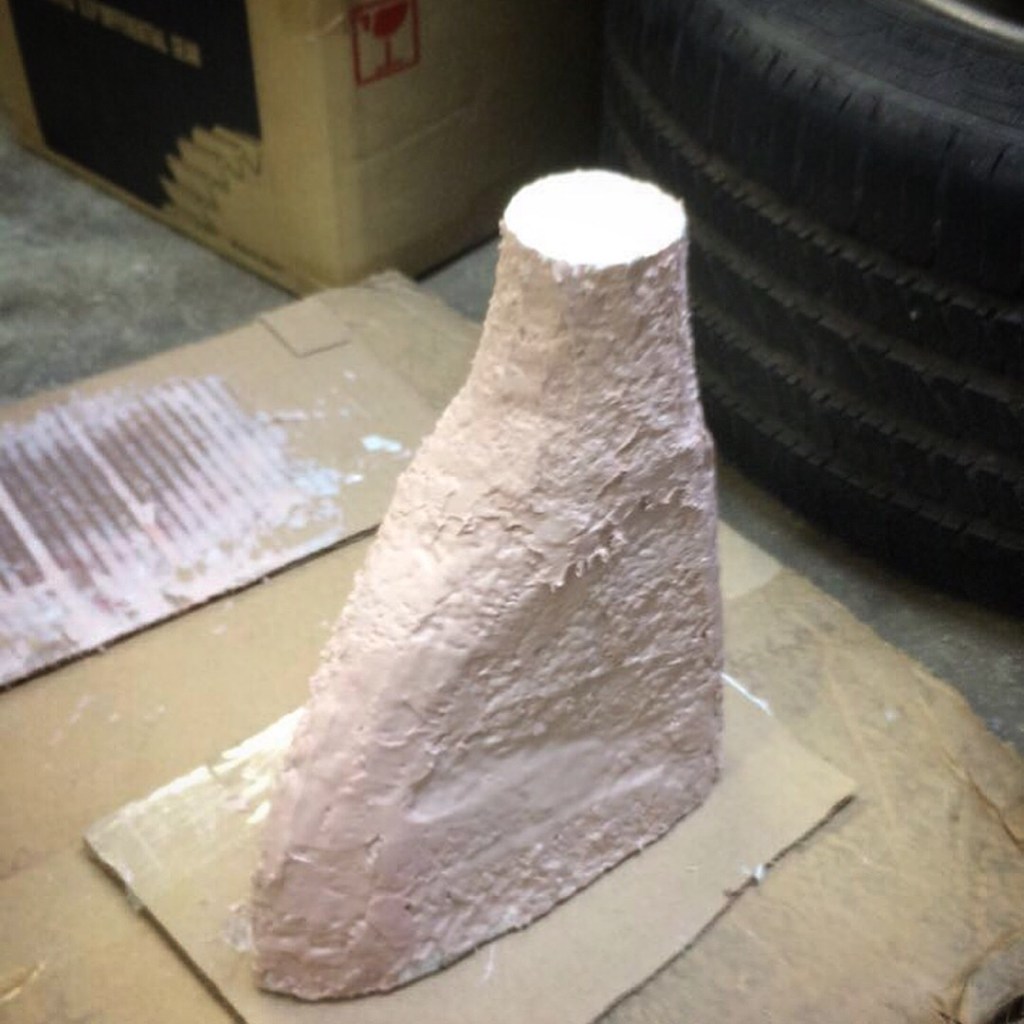
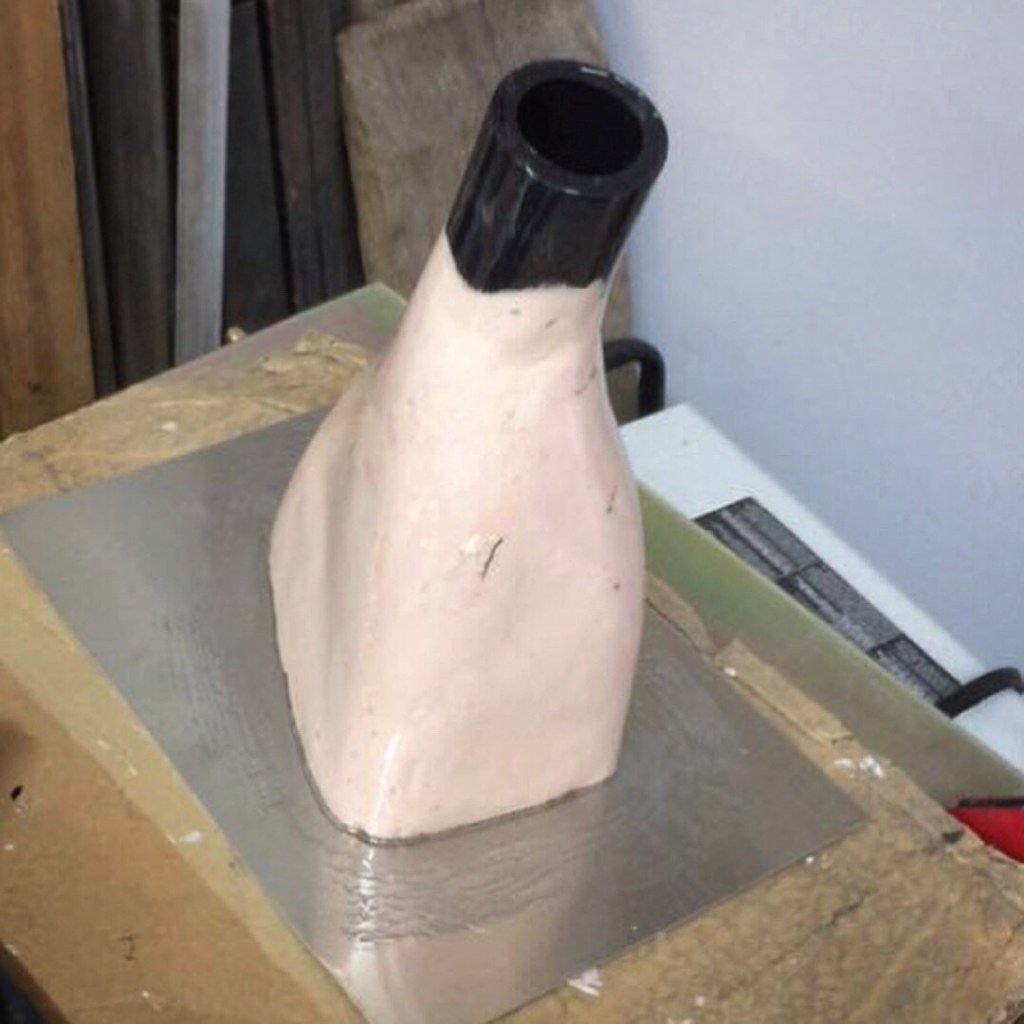
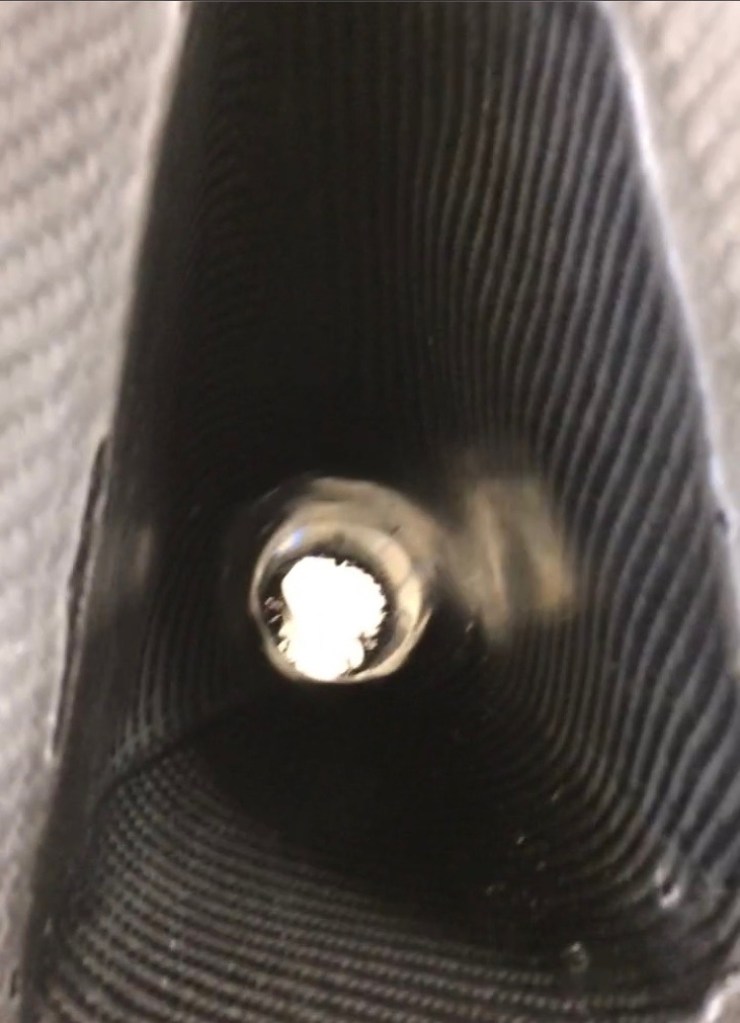
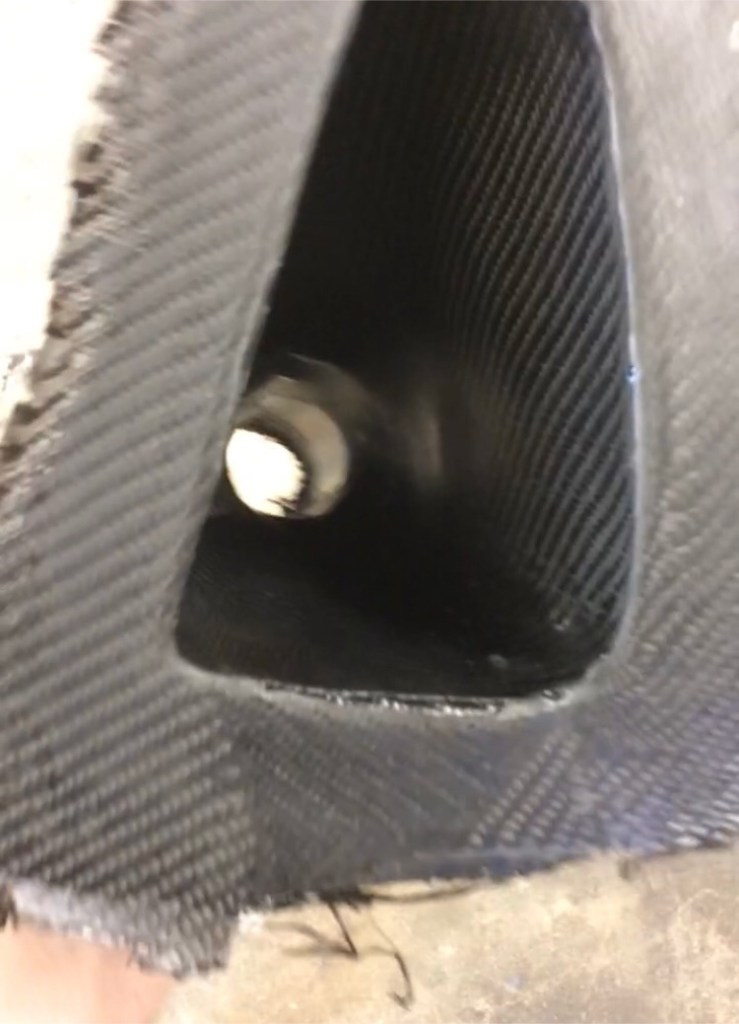
The part wasn’t necessarily pretty after being layered with Bondo, but once it had dried dried it was easily sanded to bring it closer to its final stage. It was at this point that a PVC tube (again, this was left smaller than what would be required for the flex hose) was glued onto the backside of the mold to create the mounting point for the flex hose. Following a few more coats of Bondo and sanding, to fill in any remaining imperfections and create a smooth transition from foam to PVC, the part was hot glued to an aluminum sheet to create a flange and given a single coat of epoxy to cover everything. From there it would be left to fully cure.
One lesson learned here is that where the plug meets the flange, some clay should have been added into the corner to create a less harsh transition. Sharp corners like this won’t hold epoxy well during the carbon layup process and will make it more difficult to release your carbon fiber.
Part 2 – Carbon Fiber Layup
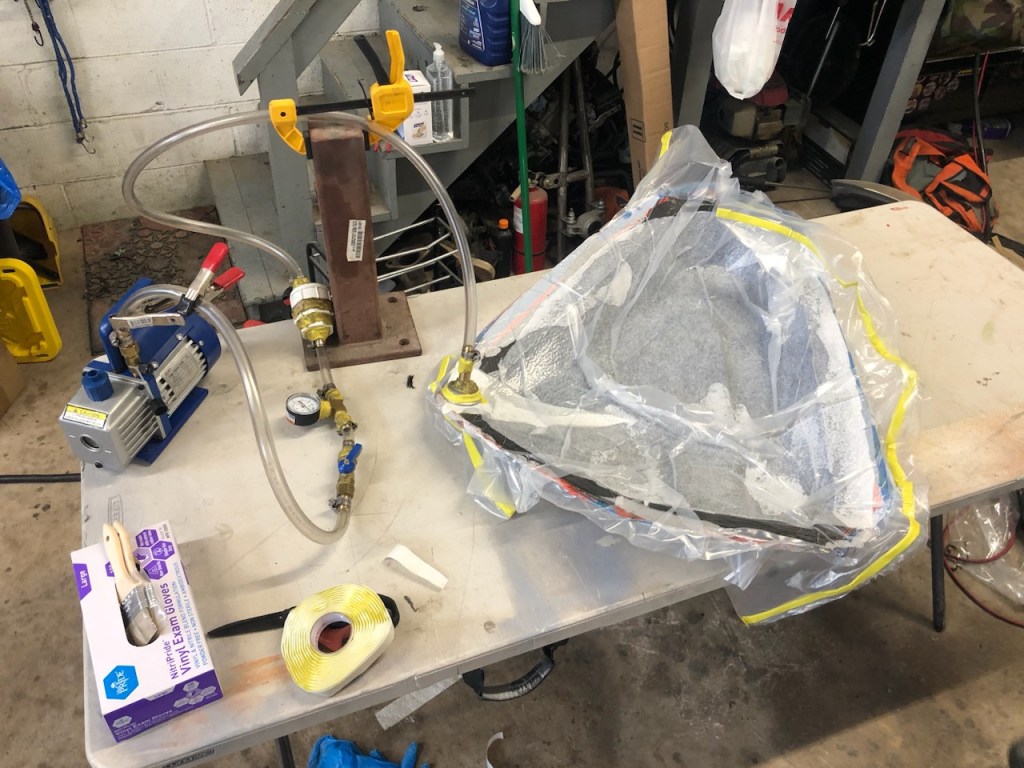
With a completed plug, it was time to wax. When that was finished, it was waxed again, and when that was finished it was waxed some more. Wax helps release the finished layup from the plug, so it’s not crazy to throw upwards of four coats of wax to ensure a plug is fully covered (epoxy making making it through the carbon and past the wax could potential adhere your carbon straight to your plug and ruin your hard work; you want enough wax to create a boundary between the plug and your composite layup).
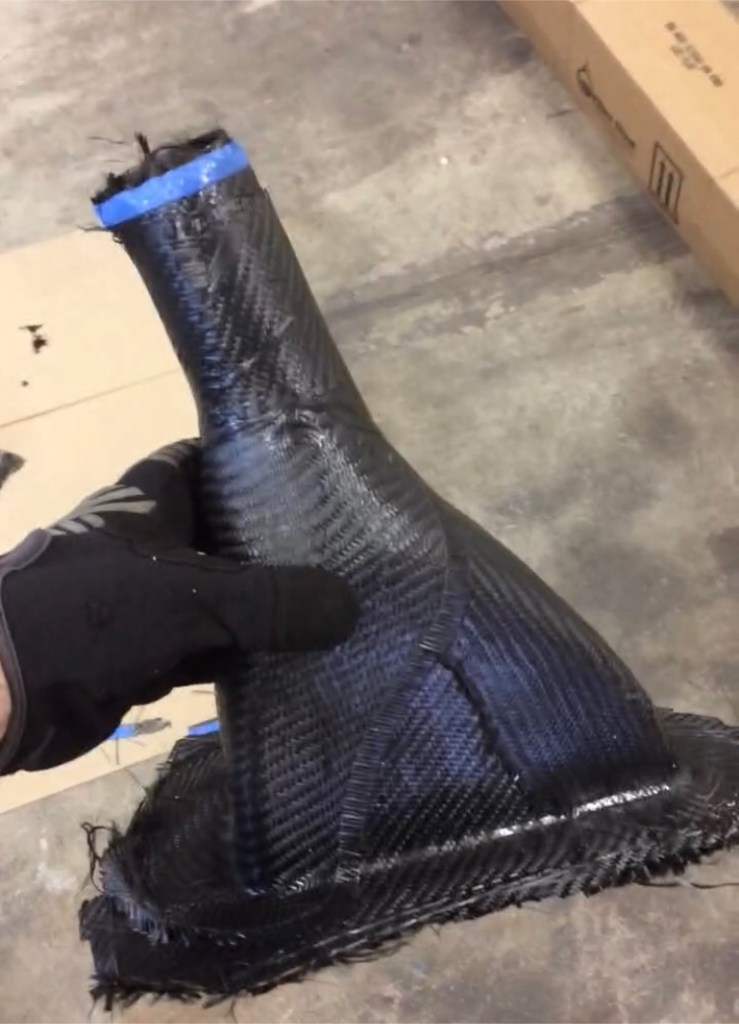
Planning at this stage was crucial to have a headache-free layup, so all of the layers of carbon were cut out to a rough shape. Because this duct being made was, more or less, an oblong “tube” and the pieces of carbon fiber would overlap to create a seam, the location of that seam was also taken into consideration (it would be put into a corner of the duct). With all of the carbon cut to shape and set aside, it was time to throw some gloves on, mask up, and get the resin mix ready. Using a 50:50 ratio of resin to cloth and a 2:1 epoxy to hardener mix, the necessary amount of epoxy and hardener was poured into a measuring container and stirred to mix. Using sponge brushes, the plug was coated with resin and the layers of carbon were added. As each layer went on, epoxy was dabbed into the carbon fiber to ensure the cloth was fully saturated before moving on to the next layer. 3 layers of carbon were layer onto the part and a long rectangular piece was wrapped around the PVC section a few additional times to strengthen the tube that the brake duct hose would clamp to.
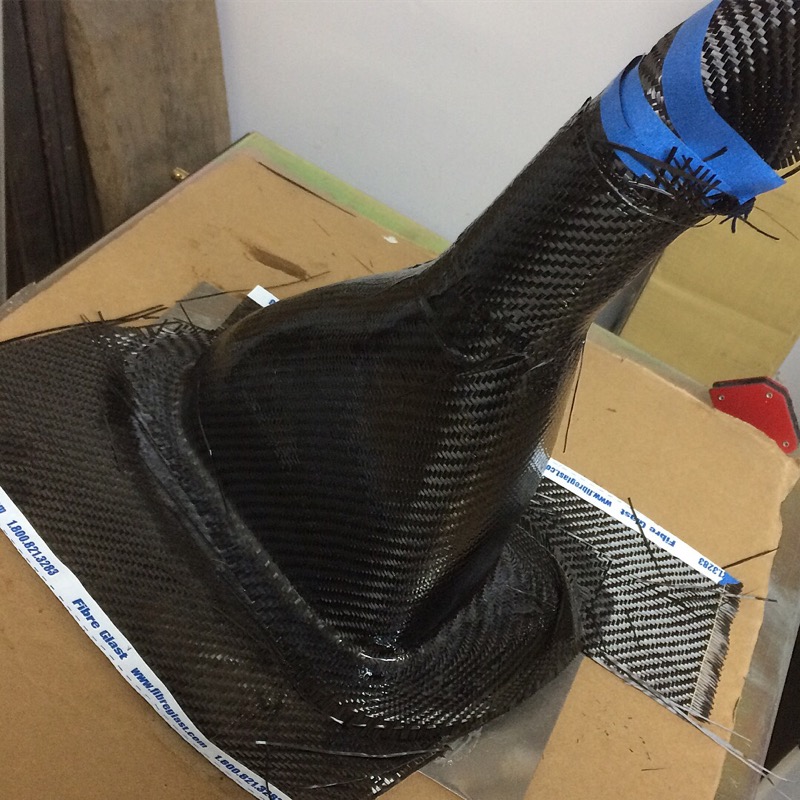
Satisfied with the way the carbon laid up and wetted out, the whole piece was left for 24 hours to harden. Remember the previous note about loading the plug up with wax? Well after the epoxy had hardened, and it was time to release the carbon piece, the plug didn’t want to give it up without a fight. After a while of wrestling and tearing out the styrofoam center, ultimately destroying the plug, the carbon duct finally separated from the plug’s grip. The finished piece, though not exactly show quality, accomplished the intended goal.
![[VIDEO] 3D Scanning a CrossKart](https://fabricatorsdomain.com/wp-content/uploads/2025/02/fs-sxms_airbox_thumbnail.png?w=1024)


Leave a comment